Rename the standard administrator account
Press Win + X and select “Computer management”: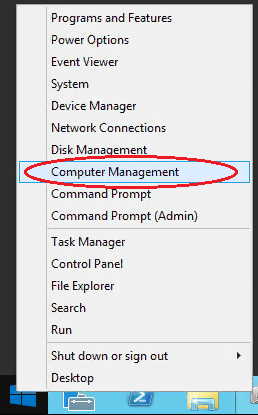
Then select “Local users” --→ “Users” --→ click with the right mouse button on user’s name “Administrator” and select “Rename”: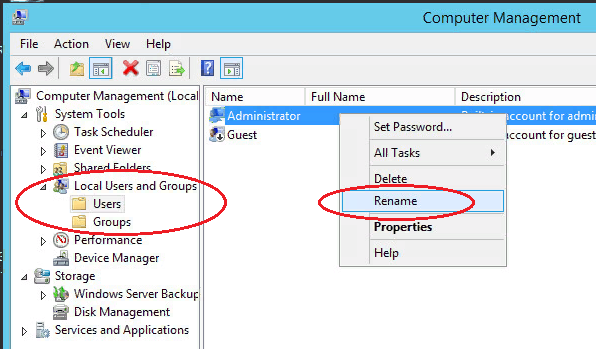
Rename an user and use this name for subsequent connection to the remote desktop.
Then select “Local users” --→ “Users” --→ click with the right mouse button on user’s name “Administrator” and select “Rename”:
Rename an user and use this name for subsequent connection to the remote desktop.
Change of standard port Remote Desktop Protocol
Brute Force Attack
In order to block multiple attempts to connect using wrong data, it is possible to trace the event log and manually block attacking IP addresses using Windows fire wall or a ready application. Let’s review the last case in details.
We will use free SW for blocking of attacking IP addresses - IPBan. This application is verified and operates with Windows Server 2008 an all subsequent versions. Windows XP and Server 2003 are not supported. Its operation algorithm is simple: the program monitors Windows event log, record log-in attempts and blocks IP address for 24 hours after 5 attempts of the hacker.
2. It contains two archives IPBan-Linux-x64.zip and IPBan-Windows-x86.zip, we need the last one. Unpack IPBan-Windows-x86.zip archive into any convenient place (for example, into C: drive root directory);
3. As files, downloaded from Internet, are automatically blocked by the system for security. All files should be unblocked for the application operation. Click with the right mouse button on all extracted files and select properties. Necessarily select “unblock”, if this parameter is available. Or open PowerShell window (Win + R, enter powershell and click on "ОК") and enter the following command:
get-childitem “folder location” | unblock-file -confirmFor example: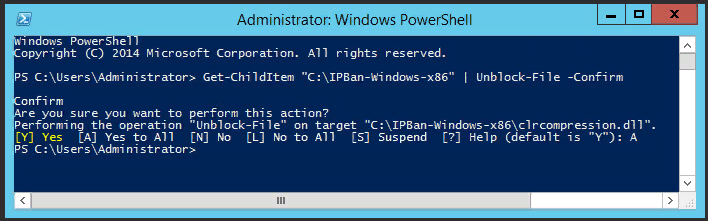
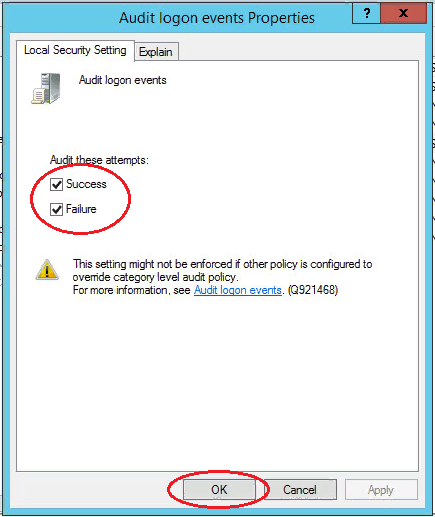
4. You should make the following changes in the local security policy, in order to make sure that IP addresses are displayed in system logs. Open “Local security policy” (Win + R, enter secpol.msc and press "OK"). Browse to “Local policies” --> “Audit policy” and enable registration of failures for “Audit account logon events” and “Audit logon events”: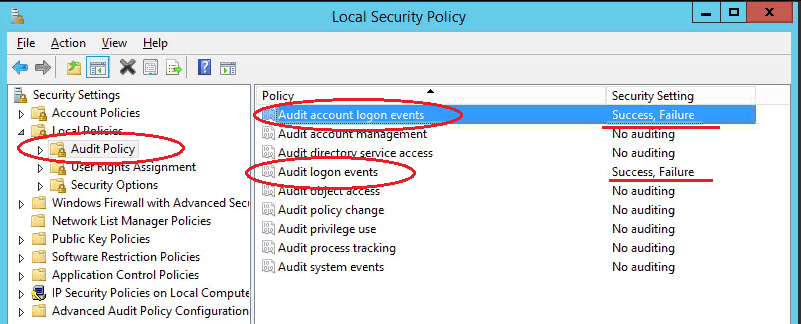
5. For Windows Server 2008 or equivalent, you should disable NTLM logins and permit only NTLM2 log-in. There is no another method to obtain IP address for log in NTLM in Windows Server 2008. Open “Local security policy” (Win + R, enter secpol.msc and press "OK"). Browse to “Local policies” --> “Security parameters” --> “Network security: NTLM restrictions: NTLM incoming traffic" and set a value “Prohibit all accounts”: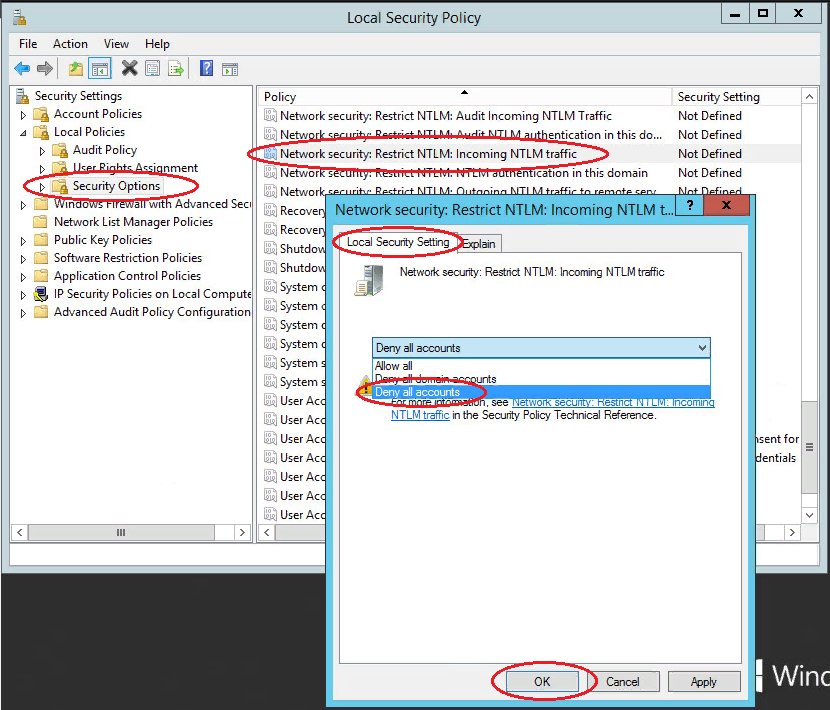 get
get
6. Now it is required to create IPBan service, so that the application is launched after the system start-up and operates in the background. Launch PowerShell (Win + R, enter powershell an press "ОК") and run the following command:
sc.exe create IPBAN type= own start= auto binPath= c:\"Directory with program"\IPBan.exe DisplayName= IPBANFor example:
Go to services (Win + R, enter services.msc an press "OK") and launch IPBAN service. Hereafter, it will be launched automatically:
In “Task dispatcher" you can look up, if the service is launched and operates: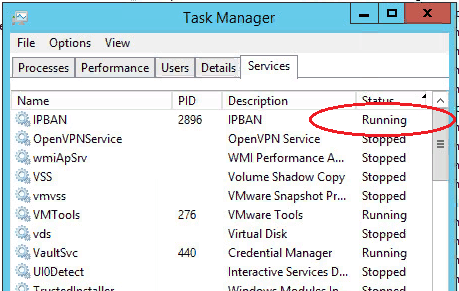
Thus, the program monitors failed authorization attempts and add unwanted IP address into the created rule for incoming connections of Windows fire wall: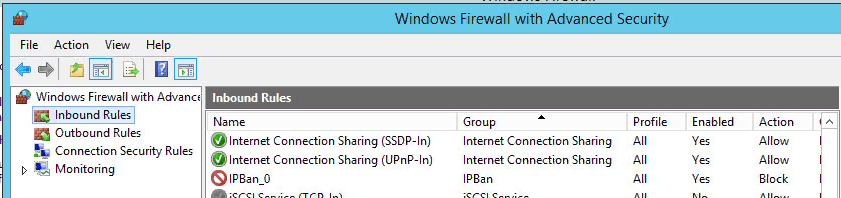
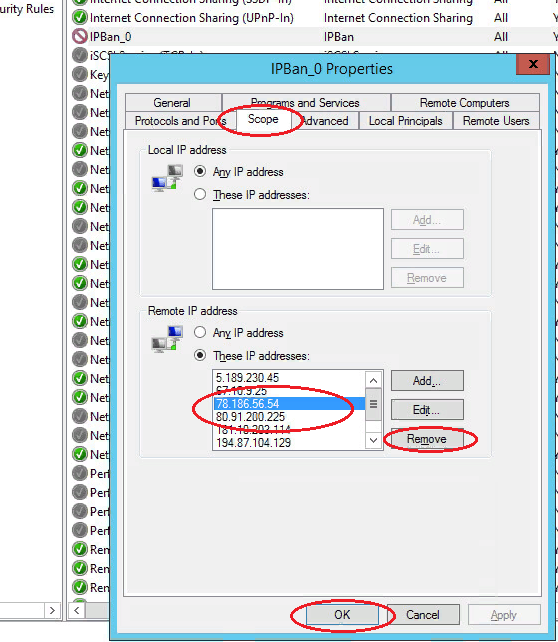
Blocked IP addresses can be unblocked manually. Go to “Scope” tab, located in "IPBan_0” rule properties and remove required IP address the list: